Your cart is empty!
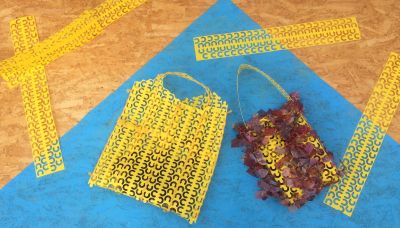
How toMake a Carry Bag with Holey Strips
Watch our tutorial
on Vimeo
or download the PDF at the bottom of the page!
- Set two complete holey strips aside to form the front and back and bottom of the bag
- Take one of the remaining strips and fold it in half then cut across the fold to form the two side inserts
- Round the corners of bottom end of each of the side inserts (these corners can be adjusted later to fit neatly into position)
- Take your remaining holey strip and cut it in half lengthwise to form the handle of the bag (you can join the two halves to make an extra long handle or just use one)
PREPARING
JOINING THE BODY OF THE BAG
- Take the two complete holey strips and line them up so that the holes (or U shapes) are as close to lined up as possible. You may need to turn them or flip them to get the best match.
- Take 5 of the tacking threads and tie the strips loosely together along one long edge this will hold your bag in place while you weave it together. Start in the centre, then two half way along then one at each end.
- Starting at one end tie your main stranded material through the top holes and proceed to sew along the edge that you want to join, tie off when you reach the other end. You can use an overcast stitch or a blanket stitch or you could try making a fringe by cutting and knotting the fabric strips at regular intervals along the edge.
- Open out the two pieces that you have joined and you now have the main body of the bag
INSERTING THE SIDES
- Gently fold this into a U shape then tie into position one of the curved ended side pieces that you cut earlier, with the curved side fitting into the bottom of the U
- Tie this into position with the tacking threads then sew along the edge of the U shape in the same manner as step 3 above. Repeat on the other side of the bag.
ATTACHING THE HANDLE
- Take one of your handle lengths (the holey strip cut lengthwise) and if you would like the extra long handle tie it to the other length at one of the narrow ends then proceed to the next step. If wou would like the shorter handle proceed straight to the next step
-
Attach each end of the handle to the top of the side sections by tying them securely and voila you have a basic bag.

